Sunday, May 30, 2010

::Roasted Vegetables::

I never named this blog "Go Lytely," "Weight Watchers Recipes," or "Diet Blog, " because, as you can tell from the recipes posted, they probably aren't the healthiest. But that is beside the point. Moderation is the key, right?! So, without further adieu, I introduce to you the healthiest recipe on this blog so far; YAY! I. LOVE. VEGETABLES. Seriously. Almost every one. I can't think of one I don't like. A couple of my most favorites are beets, peas, sweet potatoes, and squash. Anyways, sometimes vegetables can get boring for some people; but have you ever tried roasting them? Roasting vegetables gives them a flavor that can't be achieved by boiling or making them in the microwave. Roasting vegetables gives them a savory, almost sweet taste. After you roast vegetables it will be hard to go back to the steam-in-the-bag microwave frozen vegetables (even though i've gone back there many times). This is a very easy recipe and is a great side dish to many main courses. Or, have them as the main course, which I have accidentally done because they were (children cover your ears) so damn' good. Enjoy!
Roasted Vegetables
Onions
Sweet Potatoes
Regular Potatoes
Beets
Peppers
Garlic
Olive oil.
(Use any vegetables that you like/want. These are the ones I had on hand and used)

Wash vegetables and cut into chunks. Place on a pan lined with tin foil. Drizzle with olive oil and a little salt and pepper. With this recipe I don't go all crazy about different seasonings; I don't want to take away from the natural flavor of the vegetables.
Bake at about 250 for a couple hours or until tender. If you don't have the time, bake at 350 or whatever temp you want, just until they are done.
Washed and chunked.
Raw veggies ready for the oven.

In they go.
All roasted!
Ready to eat!

Thursday, May 27, 2010

::My favorite Chocolate Chip Cookie Recipe::

You can never go wrong with chocolate chip cookies. It seems like people are always on the search for a good chocolate chip cookie recipe. I think I have officially ended my search for a good recipe, as I ALWAYS go back to this one. I had been making one certain recipe for a couple of years and then was given this recipe and loved it. Even though I loved it, I still made a couple other different recipes. To make a long story short, I always have come back to this recipe and love it! I have a couple personal tips that I feel make a great chocolate chip cookie. Enjoy!

This recipe was given to me by Laura Schadewald, but i'm not sure where she got it from.

My mixer, which I love!


First step, beat the butter flavored crisco (this comes in packs of three sticks, and is the "yellow" packaged one). Beat it for 2-3 minutes...seriously....time it...it's longer than you think (I thought anyways the first time) for beating.
After you beat the b.f.c. add the sugars and mix; then add the eggs & vanilla.
Next step, pre-mix the flour, salt, and soda then mix into other mixture until blended.
Next step, fold in the chocolate chips.

The batter, before the chocolate chips.

The batter, all ready...to eat! :)
Okay, I have to get this off my chest.....
I ate cookie dough as a kid; never got sick.
I eat cookie dough now, as an adult; never get sick.
When we have children, they will eat cookie dough.
Sigh.

Normally, I use milk chocolate chips.
But this time I used the semi-sweet chocolate chips.
Good either way.

When baking cookies I always use parchment paper and am a firm believer in it.
Helps for the bottoms not to get too dark and makes for easy removal from the pan.

Because i'm a perfectionist I use a heaping tablespoon to measure out the cookie dough and then I roll them into balls.
Ready for the oven!
Bake at 350.

I did some too without rolling them into balls.

Yummy!

Warm, fresh from the oven cookie!
Okay so here is my main tip. The recipe says to bake for 8-10 minutes, however, don't follow that solely but look at how the cookies look instead. Do not overbake the cookies. Bake them until barely light (I stress light!) brown and still "doughy" "shiney" looking in the middle. Remove them from the oven, without being scared, and let them sit on the pan for a couple minutes. Then remove to a cooling rack (where I usually then cover the cookies with a light dish towel).
By removing the cookies a little before they are done and then leaving them on the pan outside of the oven, for a couple minutes, to "finish cooking", the cookies will be very soft!!
I never got a picture; but I served these as the dessert with the corn dogs. The only thing I did different was make ice cream sandwiches out of them! I didn't have one, but the soft cookie and the ice cream looked like the perfect combination!

Wednesday, May 26, 2010

::Corn Dogs::

"Everybody loves them but no one ever thinks to make them. That's reason enough right there." -Alton Brown
Since my family knows my love for cooking, I got this Food Network recipe book for my birthday a couple of years ago from my Dad & Stepmom. This recipe is from Alton Brown (from the Food Network show Good Eats), as you can obviously see from the quote above. Anyways, when I saw the picture of these in the cookbook and then saw the ingredients, I knew immediately that I had to make these. Since then, this is my second time making them and they have been a hit. Most of you know how much my husband can eat, and if not, it's A.L.O.T. So, I had made these for supper and he ate three of them and then since it was just the two of us I had batter left over. I was going to be making dinner for the guys (5 of them) the next day so I asked Jamyson if everybody would like them; what he would say next shows that they are good. "Do we have enough hot dogs? Cause we will probably need about 4 for each of them...so thats 20 of them?" Needless to say, they didn't eat 4 each, because I served other stuff. Most importantly, they all liked them!
For all the Mothers & Fathers out there; I would venture to guess that this would be fun for the kids to help with (and I don't mean the hot oil). Anyways, I hope you all enjoy this recipe as much as I do.
PS: You will see when you read the recipe, but, there are ingredients like cayenne pepper and jalapenos in this recipe...the kids will still like them, they aren't spicy.
Corn Dogs
1 gallon peanut oil (I just used vegetable oil & I usually set the burner to the middle (medium) setting to heat up the oil and then to test when it is ready I hold a toothpick in the oil and if it bubbles right away that means it's ready)
1 cup yellow corn meal
1 cup all-purpose flour
2 teaspoons kosher salt
1 teaspoon baking powder
1/4 teaspoon baking soda
1/2 teaspoon cayenne pepper
1 large jalapeno pepper, seeded and finely minced (about 2 tablespoons)
(I have done it both ways, fresh and from the jar, both ways is fine)
1 8.5-ounce can cream-style corn
1/3 cup grated onion
1 1/2 cups buttermilk
4 tablesppons cornstarch, for dredging
8 beef hot dogs
Wooden chopsticks from your local Chinese restaurant, not separated
(I used skewer sticks and broke them in half)
1. Pour oil into a deep-fryer or large heavy pot and heat to 375 degrees.
2. In a medium mixing bowl, combine the cornmeal, flour, salt, baking powder, baking soda, and cayenne pepper. In a separate bowl, combine the jalapeno, corn, onion, and buttermilk. Add the dry ingredients to the wet ingredients all at once and stir ONLY enough times to bring the batter together; there SHOULD be LUMPS. Set batter aside and allow to rest for 10 minutes.
3. Scatter the cornstarch in a dry pie pan. Roll each hot dog in the corn starch and tap well to remove any excess.
4. Transfer enough batter to almost fill a large drinking glass. Refill the glass as needed. Skewer each hot dog on a pair of chopsticks and quickly dip in and out of the batter in the drinking glass. Immediately and carefully place each hot dog into the oil and cook until coating is golden brown, about 4 to 5 minutes. With tongs, remove to cooling rack and allow to drain for 3 to 5 minutes.
Tip: Use as little cornstarch as possible, but coat each dog thinly to help the breading stay where you want it.
Tip #2: Don't cook more than a few dogs at once; crowding the pan lowers the temperature of the oil, which makes for greasy dogs.

The recipe book where I retrieved the Corn Dog recipe by Alton Brown who has the cooking show Good Eats.

If there wouldn't have been a picture to accompany this recipe, not sure I would have made them (sad!). I am such a picture person when it comes to recipes!

Some ingredients.

Dry ingredients of the batter.

Wet ingredients.

Are you looking at these wondering why they are so pink? These are my favorite hot dogs. They are Cloverdale, ALL BEEF hot dogs. Try them sometime, you can get a huge pack at Sam's Club for $9.99 (at least when I got them that is how much they were).

Hot dogs #2.

On the skewers.

Dredged in cornstarch.

This isn't a good picture but shows the batter in the glass and ready for dipping.

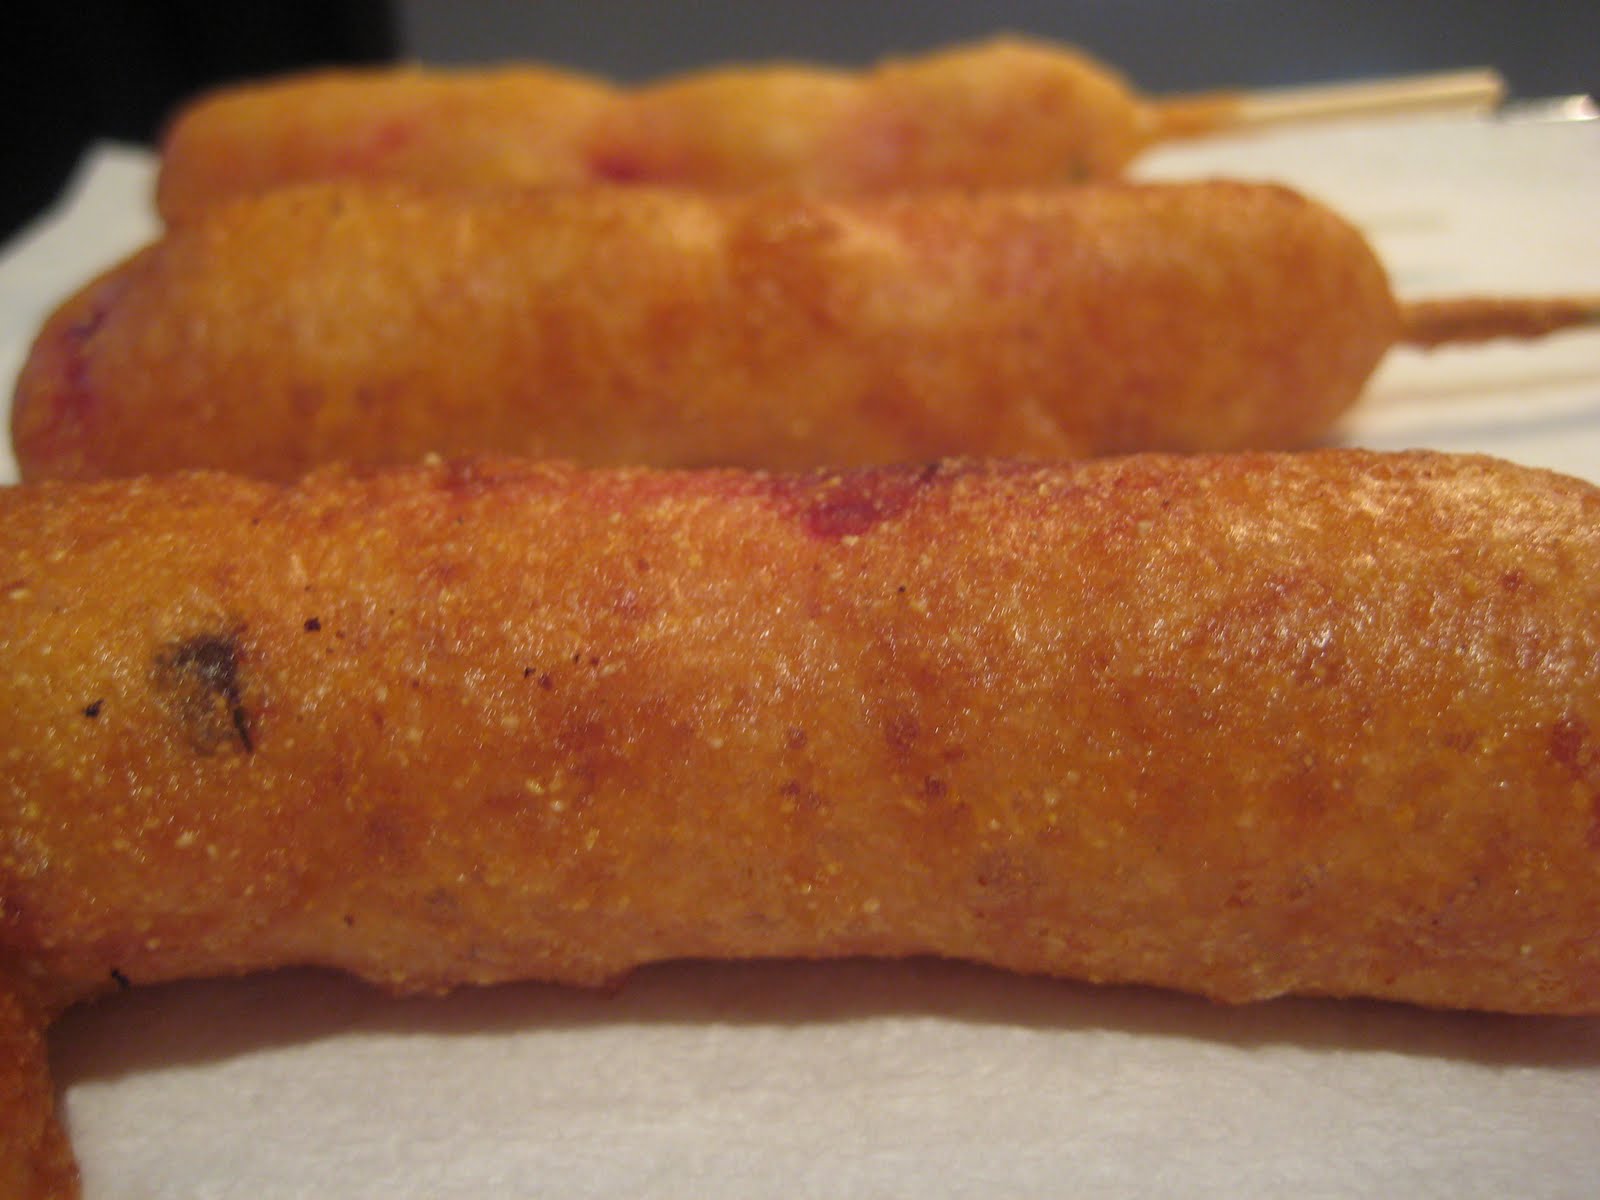
All ready to eat! Note: the corn dog way in the back. The breading is very thin. Each time I have made this recipe I have added more cornmeal then it calls for; about 1/2 cup. Anyways, if you make these make it exactly as the recipe says, using the 1 cup. When you make the first one dip it in the batter and then fry it and see what you think. Maybe you don't want alot of batter anyways, but if you want it to be thick (like my husband likes the breading to be) then just add a little more until you think it's okay. I hope I didn't scare you off from making these by saying that; by adding more it does not alter the taste at all. And if you add more or less then the 1/2 cup that I said, thats totally fine, it varies!

Fun Fact: The corn dog was invented for the Texas State Fair in 1942 and became an immediate favorite at state fairs, amusement parks, and pretty much anywhere people wanted their food served breaded, fried, and on a stick.

Tuesday, May 25, 2010

::Oven-Fried Onion Rings::

I don't even know where to start. I'm a basketcase of emotion...of ExCiTeMeNt; for this recipe! I love checking out other cooking blogs and this is where I found this recipe; from The Brown Eyed Baker at http://www.browneyedbaker.com/. Do you like onion rings? I don't go out to eat thinking "Oh, i'm going to order the onion rings tonight," but if someone orders them as an appetizer I may have just one. These are officially my favorite onion rings...ever! They are made in the oven but I can't get over how "deep-fried-like" they are. Personally, I like when fried foods are really crunchy. These fit that bill for me, these have the exact crunch as I would envision a perfectly made deep fried onion ring made just for me. Does that make me crazy? That I just envisioned a perfectly made deep fried onion ring just for me (oh crap!). What makes them so crunchy? The secret ingredient of crunched up kettle cooked potato chips. I was a little leary as I was making these because I didn't feel like enough was sticking to the onions. But I was wrong and they came out just fine. Also, I don't like when you eat an onion ring and when you take a bite you pull the onion out of the "casing;" these don't do that at all! I hope that you all make this recipe because I promise you that you won't be disappointed! Actually, I hope that when you make them and after people have eaten them you say "I don't mean to toot my own horn, but, TOOT TOOT, those were good!" Enjoy!
Oven-Fried Onion Rings
2 medium (or 1 large) sweet onions, sliced ½-inch thick
¼ cup all-purpose flour
½ teaspoon salt
¼ teaspoon ground black pepper
¼ teaspoon cayenne pepper
½ cup buttermilk
1 egg
¼ cup + 1 Tablespoon all-purpose flour
1½ cups crushed potato chips (kettle-cooked chips, if available)
3 Tablespoons vegetable oil
1. Preheat oven to 450 degrees F.
2. Combine ¼ cup flour, salt, black pepper and cayenne in a bowl.
3. In another bowl combine the buttermilk, egg and additional flour, whisking until a smooth batter is formed.
4. In a third bowl, place the crushed potato chips.
5. Prepare the onion rings by first dipping a ring into the seasoned flour, then into the batter (let the excess batter drip off), and then coat with the crushed potato chips. As you finish the rings, place them on a large plate. Repeat with all rings.
6. Cover a baking sheet with a piece of parchment paper. Drizzle the vegetable oil on the parchment-lined sheet and place in the oven for 8 minutes. Carefully remove the sheet from the oven and tilt to evenly coat with oil.
7. Working quickly, place your onion rings on the baking sheet and return to oven. Bake for 8 minutes, then flip onion rings and bake for an additional 6-8 minutes, or until golden brown.
8. While baking, prepare your dipping sauce!
(Brown Eyed Baker adapted this from http://www.notwithoutsalt.com/)

These make them have that perfect crunchy texture.

Making the coating for the "dry" part.

Sliced onions; I thought they were going to be too thick and wouldn't get soft in the oven, but they weren't at all!

The order of dipping; onions, dry dip, buttermilk mixture, and the chips!

Ready for the oven.

Another shot; ready for the oven.

All done! The picture DOES NOT do them justice; I repeat DOES NOT do them justice!
Find out for yourself!

Ready to eat.
Dipping Sauce

½ cup mayonnaise
2 teaspoons ketchup
2 Tablespoons horseradish
¼ teaspoon paprika¼ teaspoon salt
1/8 teaspoon garlic powder
1/8 teaspoon dried oregano
Dash ground black pepper
Dash cayenne pepper
Combine all ingredients and refrigerate.
(Brown Eyed Baker adapted this from http://www.copykat.com/)

Mixing in the spices. I made this ahead of time and put it in the fridge while I was making the onion rings. I like to dip in things that are cold, i'm weird like that.

Ready to be dipped in!

Sunday, May 23, 2010

::Ranchy Potatoes::

I'm on about my second week of being a blogger and I have been enjoying sharing recipes and pictures with you and I hope you feel the same! I have gotten alot of comments from people who have made the recipes and it is so rewarding to hear that #1 people have been looking at the blog, #2 actually making the recipes, and #3 enjoying them; I hope you continue to all do that. I have been preparing for taking my state boards for getting my nursing license so this is a great break during the day from all of that. Anyways, I hope you all have been enjoying the weekend and maybe even made the Catalina Chicken (please comment on that post and tell me what you think)! This next recipe is one that can be made on the grill or in the oven, this time I made it in the oven. Anyways, who doesn't like potatoes and who doesn't like ranch? Well when you put them together it makes your mouth spin circles! Enjoy!
Ranchy Potatoes
Potatoes
Onions
Olive Oil or Butter
Pepper
Garlic Salt
Onion Salt
Ranch
Tin Foil
Wash potatoes and peel the onion. Thinly slice potatoes and chunk the onions. Tear off a nice sized piece of tin foil and place a layer of potatoes on it. Sprinkle on pepper, onion and garlic salt, and then place onions on top. Drizzle with olive oil or place on dabs of butter. Place another layer of potatoes on top and repeat the previous steps. Fold in tin foil to cover and place in oven at 350 degrees for about an hour, or until the potatoes are done. When potatoes are done, place however much ranch you would like on top and place back into oven (but don't cover with tin foil). Keep in oven until the ranch is warm. Serve, enjoy, and then you may need to go for a walk; depending on how much ranch you use?! :)

All the ingredients.

Sliced potatoes.

Seasoned potatoes.

Onions on top.


Last step ending with the olive oil.


Bundle of joy!


Potatoes done baking.

Final product smothered in ranch.

Friday, May 21, 2010

::Catalina Chicken::

It is so nice that the weather is warm and we are able to grill! Looking for something different to grill this weekend? I think the first time I had chicken this way was when my Mom made it. This is a great, unique, and easy way to make chicken. The simple marinade gives this a great flavor. I cooked for the guys for dinner the day they worked calves, and I knew there was going to be a few extra people here, so I marinated 6 chicken breasts. Long story short, they were all gone before I was able to get a picture of the finished product; but oh well...I guess that means they were good! Also, I hadn't made this before, but I decided to make a little dipping sauce to go with it, and it turned out good. Have a great weekend and enjoy the recipe!
Catalina Chicken

Chicken Breasts
Catalina Salad Dressing
Directions: For about 4 chicken breasts use one bottle of Catalina Dressing. I put these in the marinade at about 7:30am and grilled them at about 1pm. Just throw the chicken in a Ziploc bag and pour in the dressing. Roll the chicken around in it and place in the fridge; rolling it around a couple different times when it is marinating.
Tips: I have read/heard that if you marinate meat too long it can break down and make it tough. I also pounded the chicken a little before I put the marinade on.
Sauce:
I never measured when I made it so i'll guess the approximates:
1/2 Catalina Dressing
3-4 Tbsp. Ranch dressing
Mix and serve.
I heated a little in the micromave before I served it.

Fresh chicken breasts.

Catalina dressing that is used.


Marinating